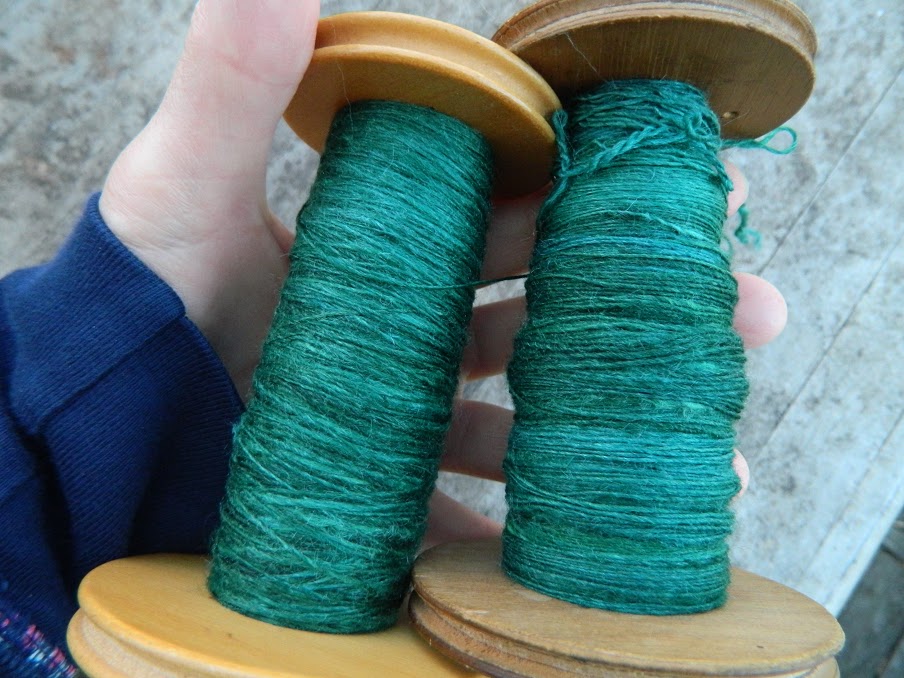
I was pretty sure the latest plied yarn was going to be a kinky mess.
I peddled like a maniac to get enough twist in it. It wasn't though. It's behaving just fine.
This is a big improvement. The plies hold together much better.
I've still got more to ply though. My bobbin couldn't hold it all.
I've decided that the pattern will be A Hap for Harriet by Kate Davies. It's not exactly what I usually make for a light spring shawlette to wear to the usually too warm MDSW but as soon as I saw this pattern I knew this yarn wanted to be it-and you can't argue with yarn.
Monday, March 6, 2017
Sunday, March 5, 2017
Easy Peasy
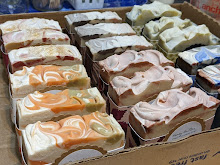
This is face soap in progress so you can see how easy it is to make. All I do is buy a block of pre-made soap. You can get it at Micheal's, Amazon or most other craft stores. I get mine here.
No special equipment or protection is required. It's just soap. You just chop it up and melt it in the microwave. You can add whatever you want to it to make it your own. I use a lot of oatmeal, clay, essential oils and charcoal as additives.
I add some cosmetic color mixed with a small amount of pure glycerin before pouring the melted soap into molds. These are to be shaped and then embedded to make a fancy design. I cut them up, grate them up and use a peeler to make little roll ups.
Then I chop up a lot more of the block for the base.
It gets melted in the microwave. It takes less than a minute.
The chopped up pieces get sprayed with alcohol so they stick to the melted base.
They all get arranged in the mold in several layers.
In just a few short hours the soap mixture is ready to be pushed out of the mold and cut into bars.
Then it's wrapped and off it goes. You can use it right away. See? Easy Peasy Pie.
Not only is it easy but it's fun to come up with different combinations of shapes and colors. It's sculpting with soap. Clean up is a breeze. Since you start with soap, you end up with soap no matter what mess you make. Nothing goes to waste.
No special equipment or protection is required. It's just soap. You just chop it up and melt it in the microwave. You can add whatever you want to it to make it your own. I use a lot of oatmeal, clay, essential oils and charcoal as additives.
I add some cosmetic color mixed with a small amount of pure glycerin before pouring the melted soap into molds. These are to be shaped and then embedded to make a fancy design. I cut them up, grate them up and use a peeler to make little roll ups.
Then I chop up a lot more of the block for the base.
It gets melted in the microwave. It takes less than a minute.
The chopped up pieces get sprayed with alcohol so they stick to the melted base.
They all get arranged in the mold in several layers.
In just a few short hours the soap mixture is ready to be pushed out of the mold and cut into bars.
Then it's wrapped and off it goes. You can use it right away. See? Easy Peasy Pie.
Not only is it easy but it's fun to come up with different combinations of shapes and colors. It's sculpting with soap. Clean up is a breeze. Since you start with soap, you end up with soap no matter what mess you make. Nothing goes to waste.
Saturday, March 4, 2017
Sprung
In spite of it being quite chilly again, spring is here.
Everything is coming back to life.
The flowering creeping things are starting to bloom.
The woods are where I find the prettiest crocus. Something stole my bulbs and replanted them all over the place.
Look at that. My ill fated chrysanthemum didn't really die after all. I wonder if it will survive once the humidity and heavy shade take back over. I wonder if I will. I think this summer is going to a doozey.
Everything is coming back to life.
The flowering creeping things are starting to bloom.
The woods are where I find the prettiest crocus. Something stole my bulbs and replanted them all over the place.
Look at that. My ill fated chrysanthemum didn't really die after all. I wonder if it will survive once the humidity and heavy shade take back over. I wonder if I will. I think this summer is going to a doozey.
Friday, March 3, 2017
Uh, Oh.....
I was very happy to see this box show up in the mail.
It had the yarn for my new mitten project in it.
As soon as I opened the box I realized I had made a mistake. Two White Swish DK, two Garnet Heather Swish DK, two....oops. ONE Capra in Turmeric for the lining? What was I thinking? I need enough yarn for the lining of TWO mittens. Boo me.
This was the best I could do for color matching of the kit using Knit Picks DK. It's not too bad. The Capra is nice and soft. Another ball is winging its way to me as I write this-that and a couple of balls of clearance Felici. There is always a silver lining when it comes to yarn.
It had the yarn for my new mitten project in it.
As soon as I opened the box I realized I had made a mistake. Two White Swish DK, two Garnet Heather Swish DK, two....oops. ONE Capra in Turmeric for the lining? What was I thinking? I need enough yarn for the lining of TWO mittens. Boo me.
This was the best I could do for color matching of the kit using Knit Picks DK. It's not too bad. The Capra is nice and soft. Another ball is winging its way to me as I write this-that and a couple of balls of clearance Felici. There is always a silver lining when it comes to yarn.
Thursday, March 2, 2017
Time to Ply
I've got two bobbins of Spunky Eclectic Merino/Silk in Forest Dancer ready to ply.
I also had a nice morning on Tuesday. It helped to get the wheel outside so I could see what I was doing.
One bobbin was spun on a drop spindle, the other on the wheel. Can you tell the difference. Me either.
I watched the videos in my Craftsy spinning class before I got started and it helped to know that for the most part I really have the right idea. I just need to check on what's going on more often and rewind and re-spin when necessary. I also want to thank all of you that gave me advice in the comments. Your little tricks and tips really helped as well. I'm looking at plying in a whole new way-and I'm liking what I am seeing.
I also had a nice morning on Tuesday. It helped to get the wheel outside so I could see what I was doing.
One bobbin was spun on a drop spindle, the other on the wheel. Can you tell the difference. Me either.
I watched the videos in my Craftsy spinning class before I got started and it helped to know that for the most part I really have the right idea. I just need to check on what's going on more often and rewind and re-spin when necessary. I also want to thank all of you that gave me advice in the comments. Your little tricks and tips really helped as well. I'm looking at plying in a whole new way-and I'm liking what I am seeing.
Wednesday, March 1, 2017
March
My March card kit is here. I am not sure what to make of some of it.
I like the stamps.
What's not to like about bunnies and chicks.
Coloring them was fun.
I cut them out and made a quick card.
Hmmm.....I am not sure about this stencil stuff though. I am going to need some practice and some inspiration. The Youtube tutorials are just starting to come out for this kit so I'll be looking forward to more than a little guidance this month.
I also want to thank sandflies for this surprise that showed up today.
I opened it before The Mister got home and do you know how hard it was for me not to touch any of it before he got to see it? There may or may not have been one of the molasses chips missing. He won't know the difference. Mmmmm....
I like the stamps.
What's not to like about bunnies and chicks.
Coloring them was fun.
I cut them out and made a quick card.
Hmmm.....I am not sure about this stencil stuff though. I am going to need some practice and some inspiration. The Youtube tutorials are just starting to come out for this kit so I'll be looking forward to more than a little guidance this month.
I also want to thank sandflies for this surprise that showed up today.
I opened it before The Mister got home and do you know how hard it was for me not to touch any of it before he got to see it? There may or may not have been one of the molasses chips missing. He won't know the difference. Mmmmm....
Tuesday, February 28, 2017
Old and New
The Ghazal cowl is done. The grafting went easier than I expected. Garter Kitchener is pretty simple. Who knew?
The second edge on the mosaic blankie is done. For the record, I started this project in 2010.
I just need to go down the long sides and then it will be a done deal.
To reward myself for getting things done, I bought myself this pattern. It's Snowfling and it's from Tanis Fiber Arts. I saw them on Kathy B's blog and fell in love. The kits are sold out but you can still get the pattern on Ravelry. The yarn is all gone too. I went stash diving in hopes of finding enough of something to get started but sadly my stock of dk weight is woefully inadequate. Knit Picks came to the rescue. Now I just have to wait.
The second edge on the mosaic blankie is done. For the record, I started this project in 2010.
I just need to go down the long sides and then it will be a done deal.
That's a lot of stitches but those borders are narrower. Thank goodness because I am really over this project. It's quite big enough and Pup agrees.
Subscribe to:
Posts (Atom)